Create Your First Map
This guide walks you through saving a QGIS project as a Kumoy map and viewing it on the web.
Save the Current Project to Kumoy#
If you haven't created or selected an organization and project yet, complete that step first at Select an Organization and Project in QGIS.
-
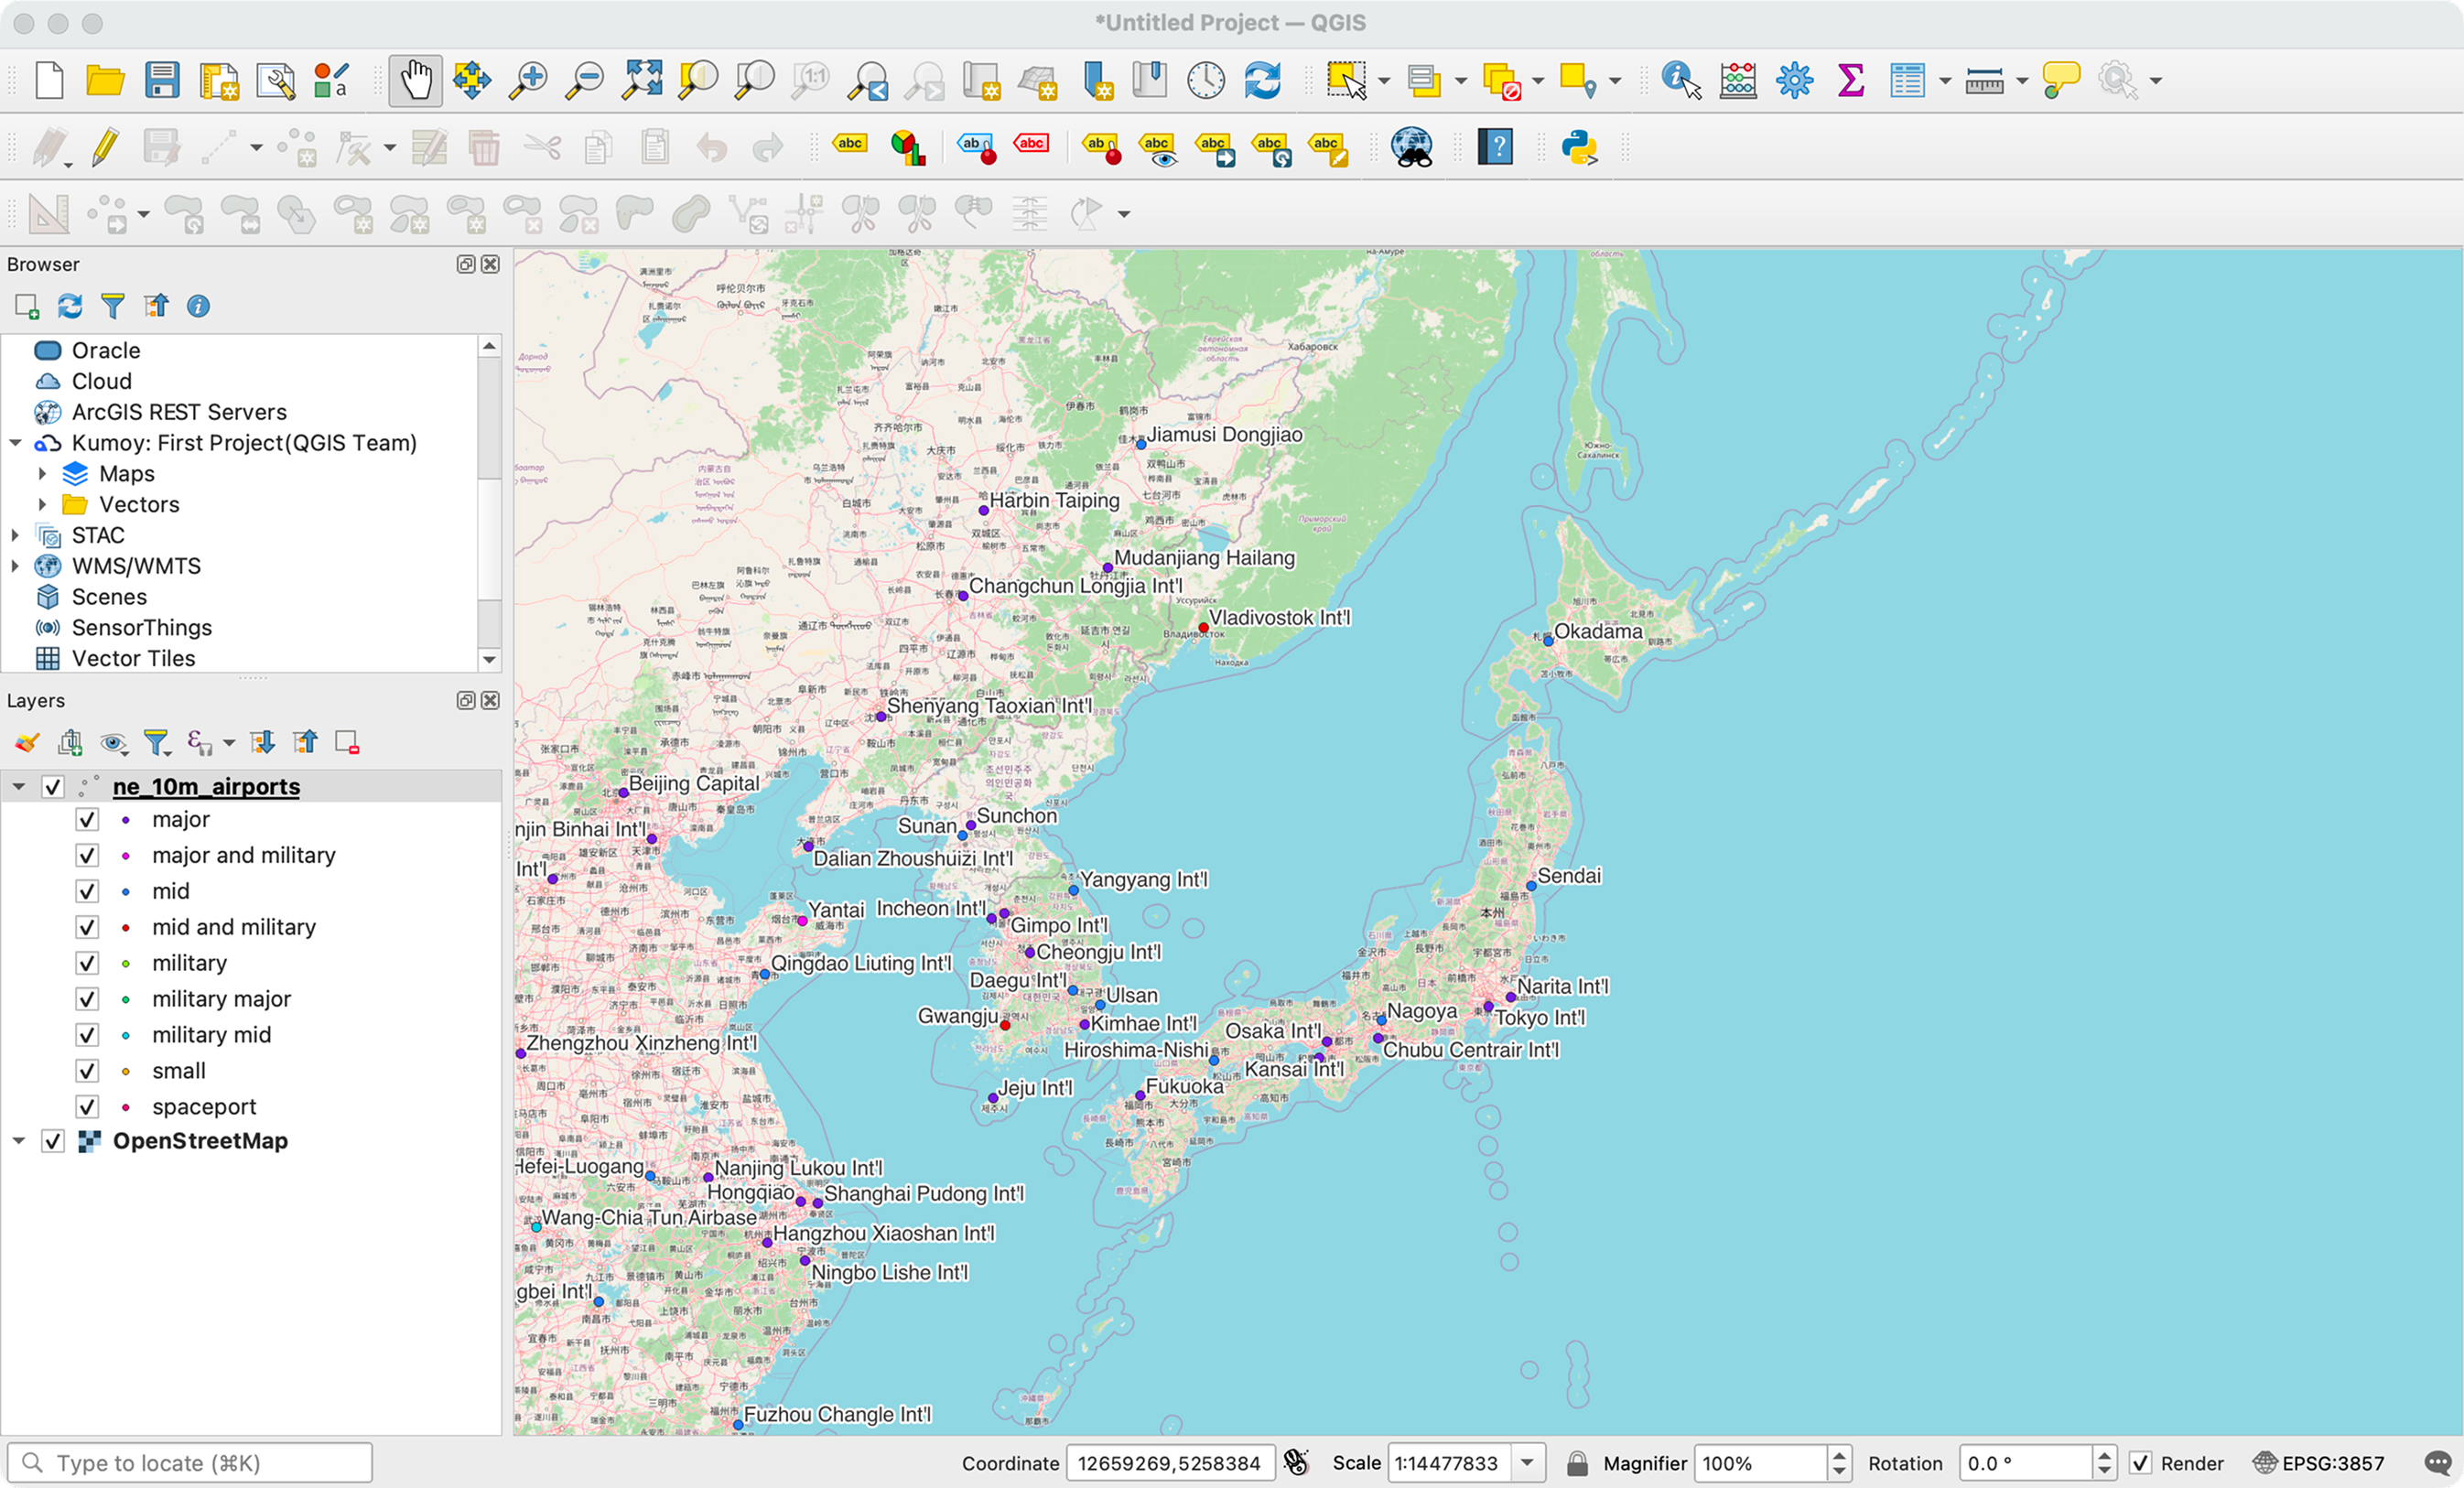
In QGIS, create a map using local vector layers, XYZ Tiles.
-
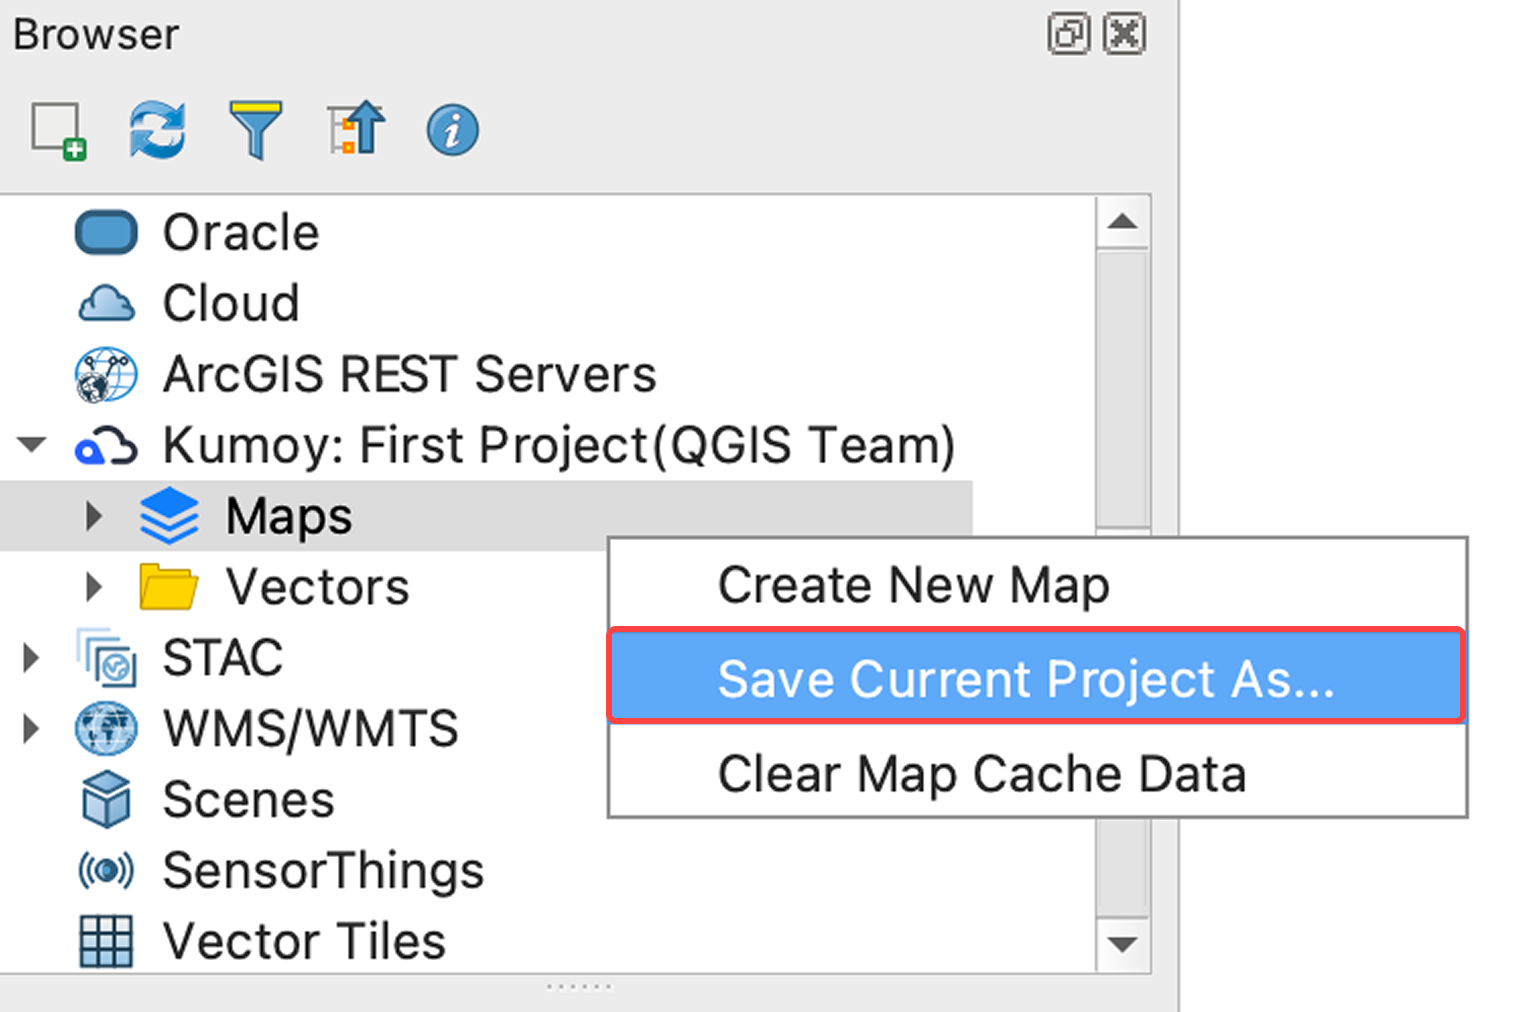
Right-click Maps in the Browser panel and select Save current project as....
-
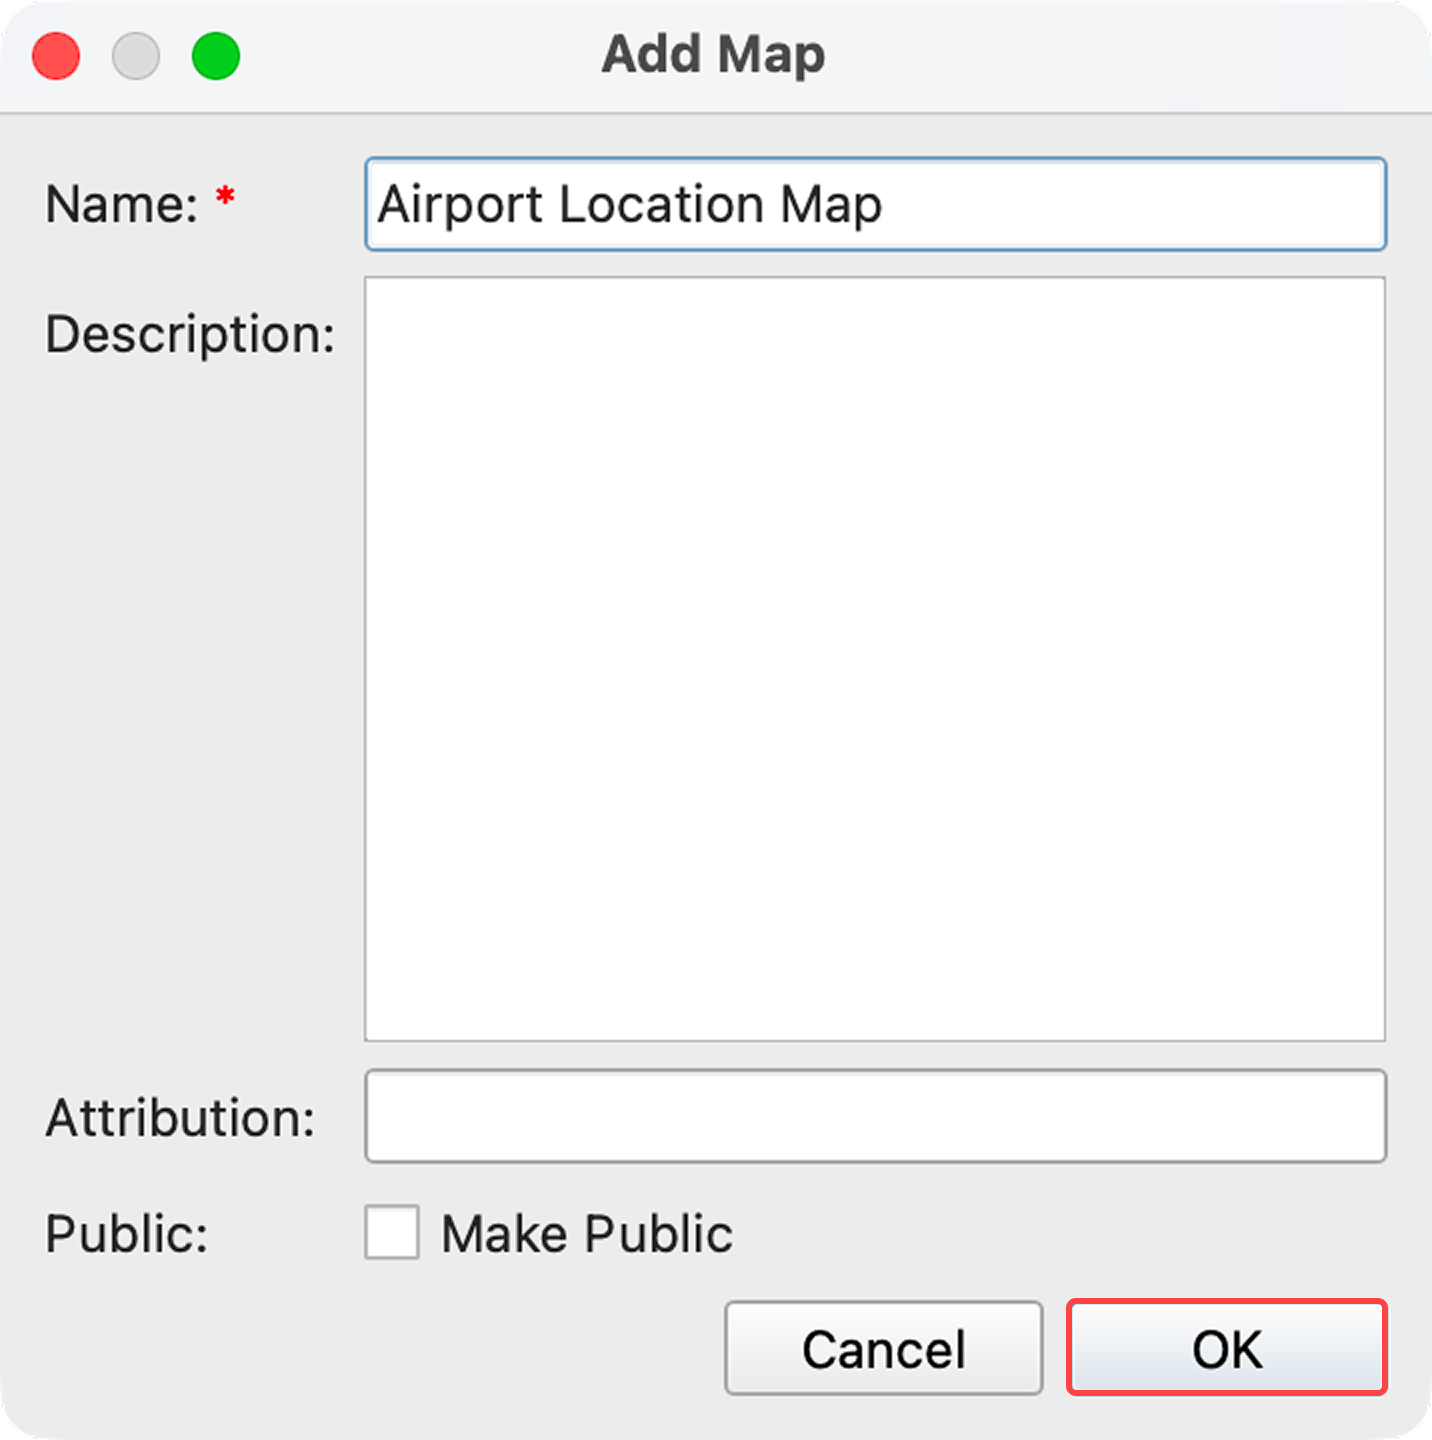
Enter the map name and other details, then click OK.
-
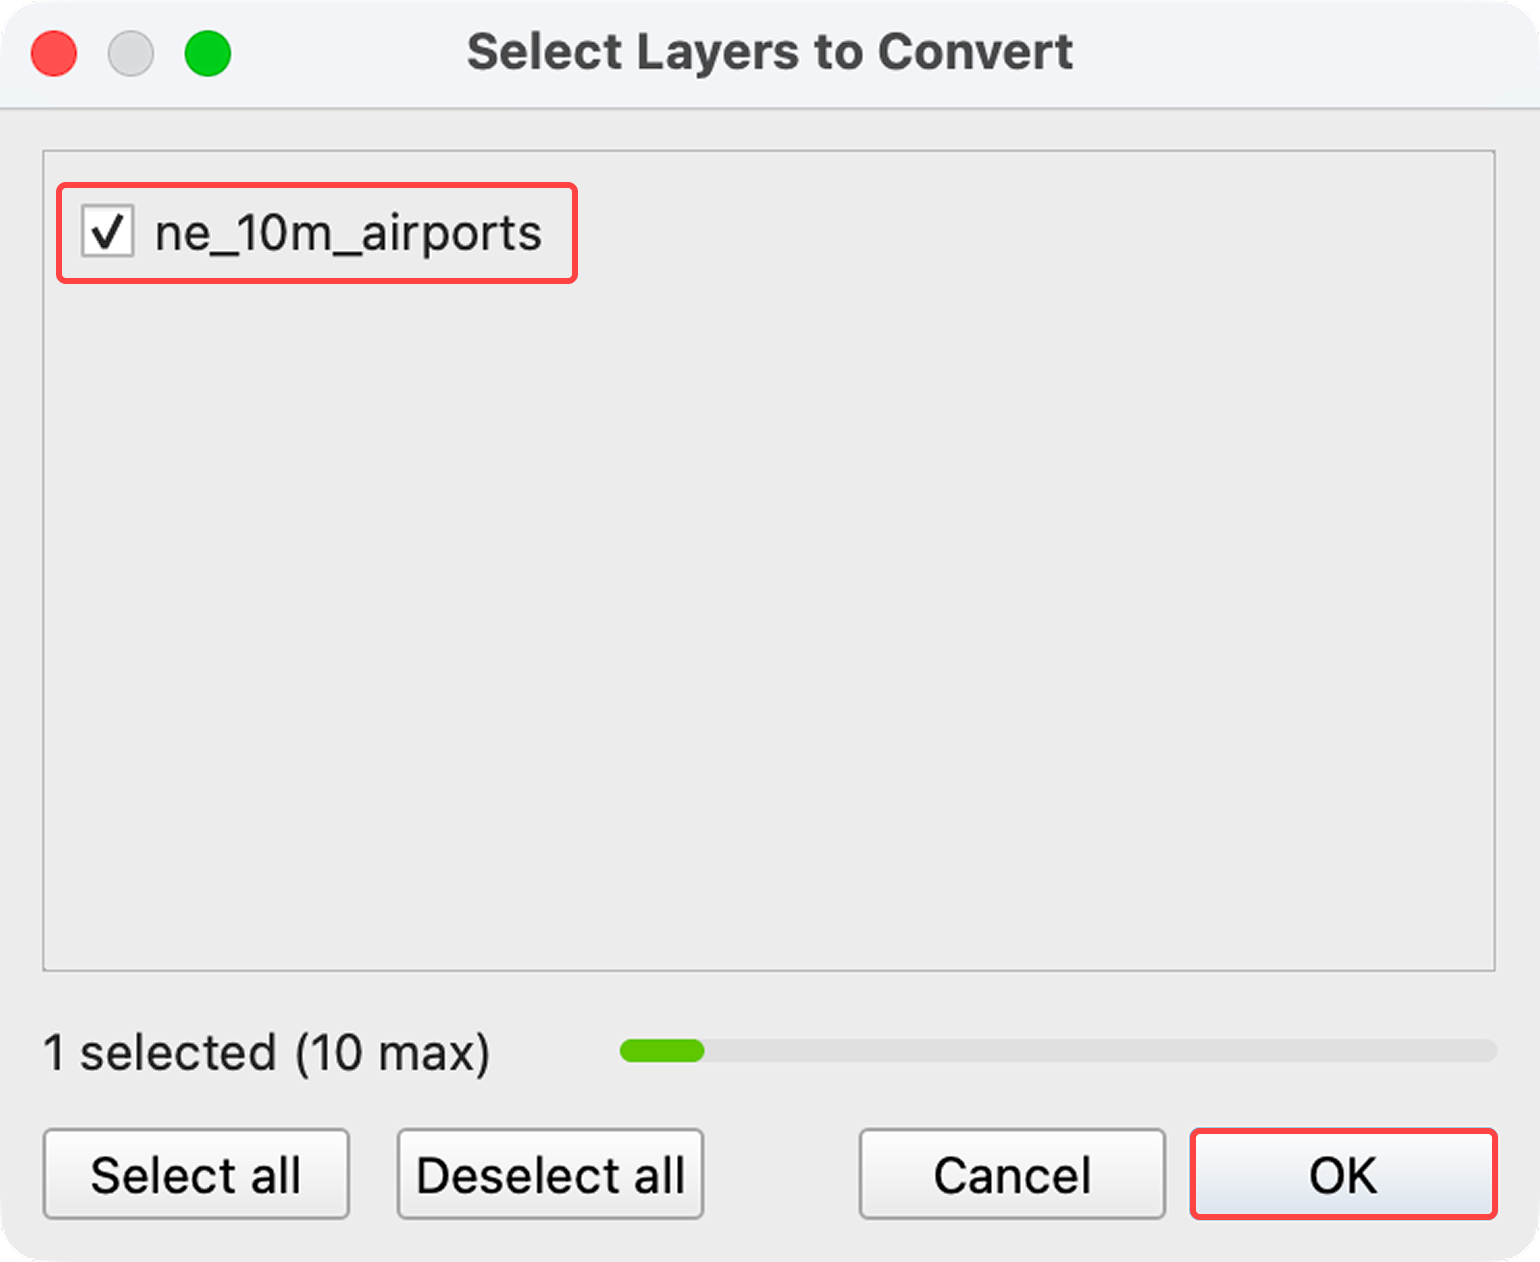
Check the layers you want to convert to Kumoy vectors, then click OK.
-
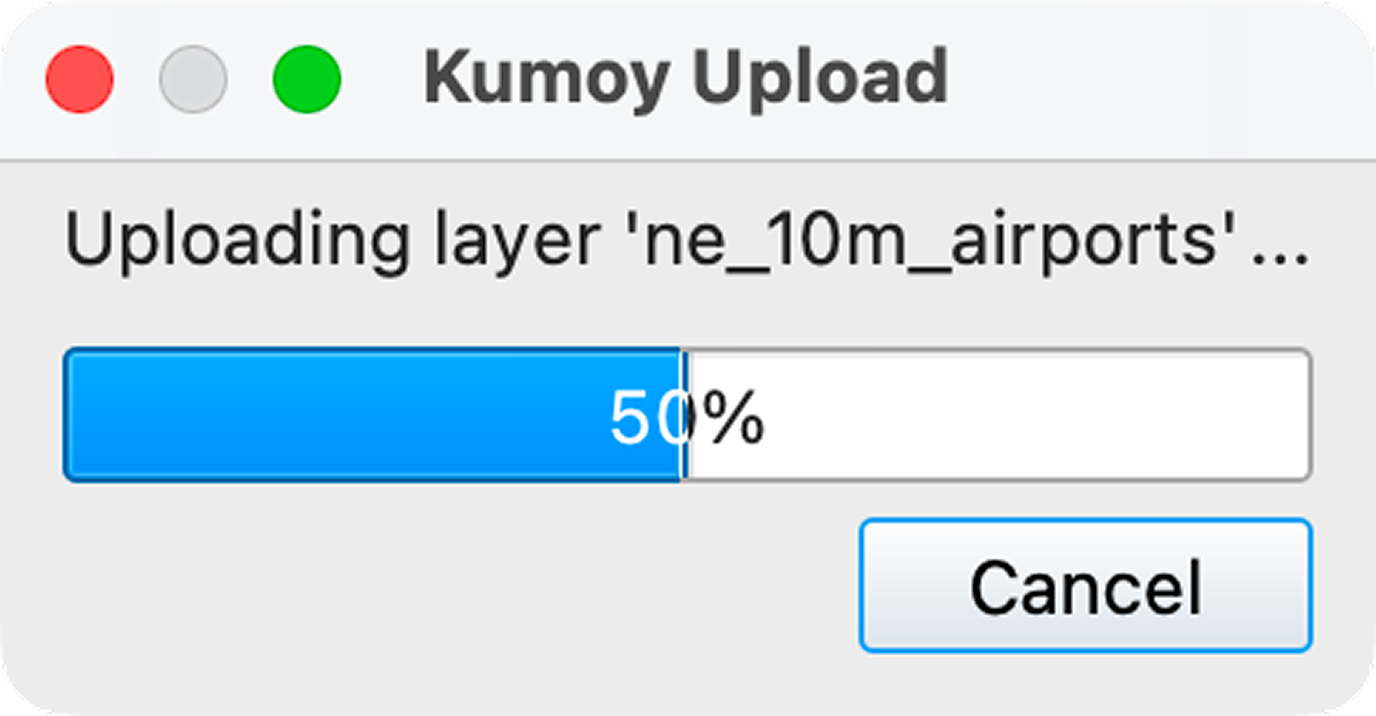
The upload to Kumoy will begin.
-
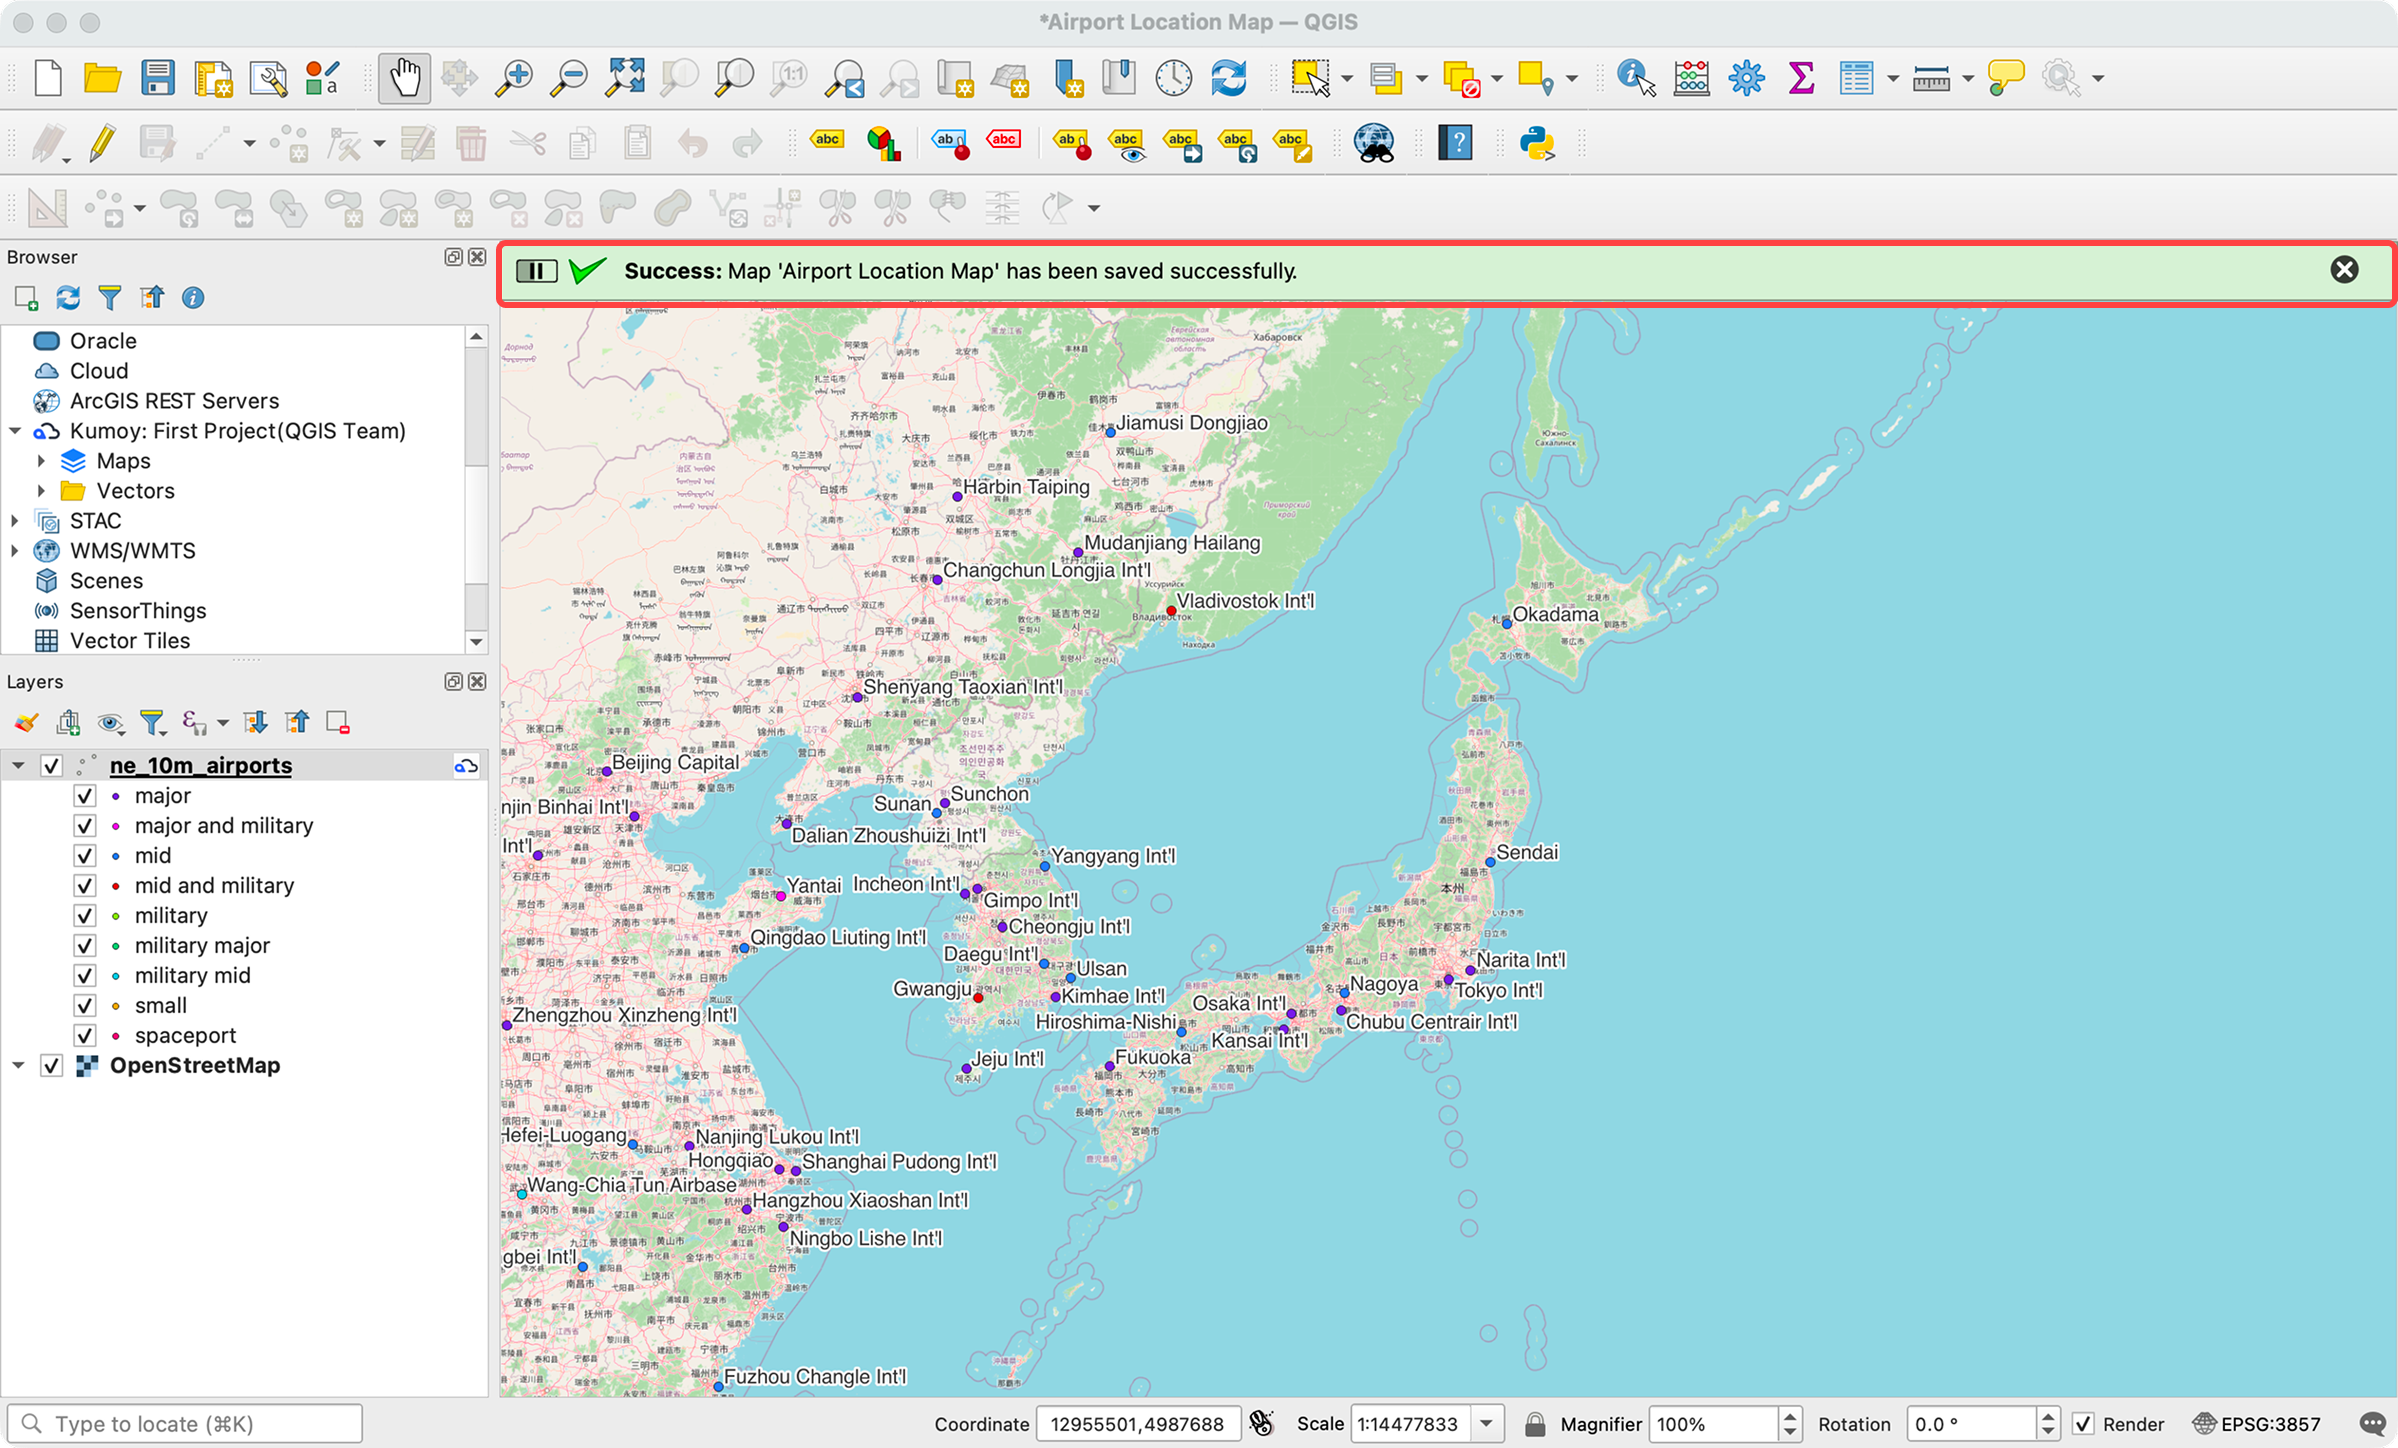
Once the upload is complete, the project reloads and opens the map saved to Kumoy. Kumoy layers appears with specific icon in the Layers panel.
View the Map on the Web#
With your map saved to Kumoy, let's visualize it in the browser.
-
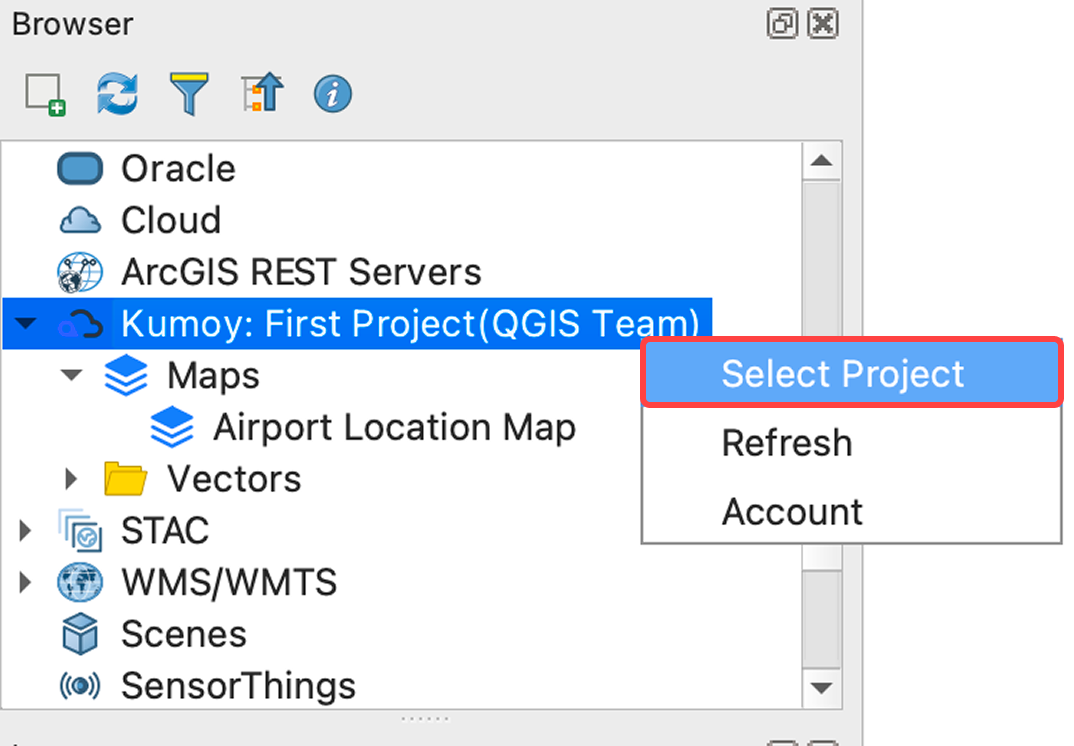
Right-click Kumoy in the Browser panel and click Select Project.
-
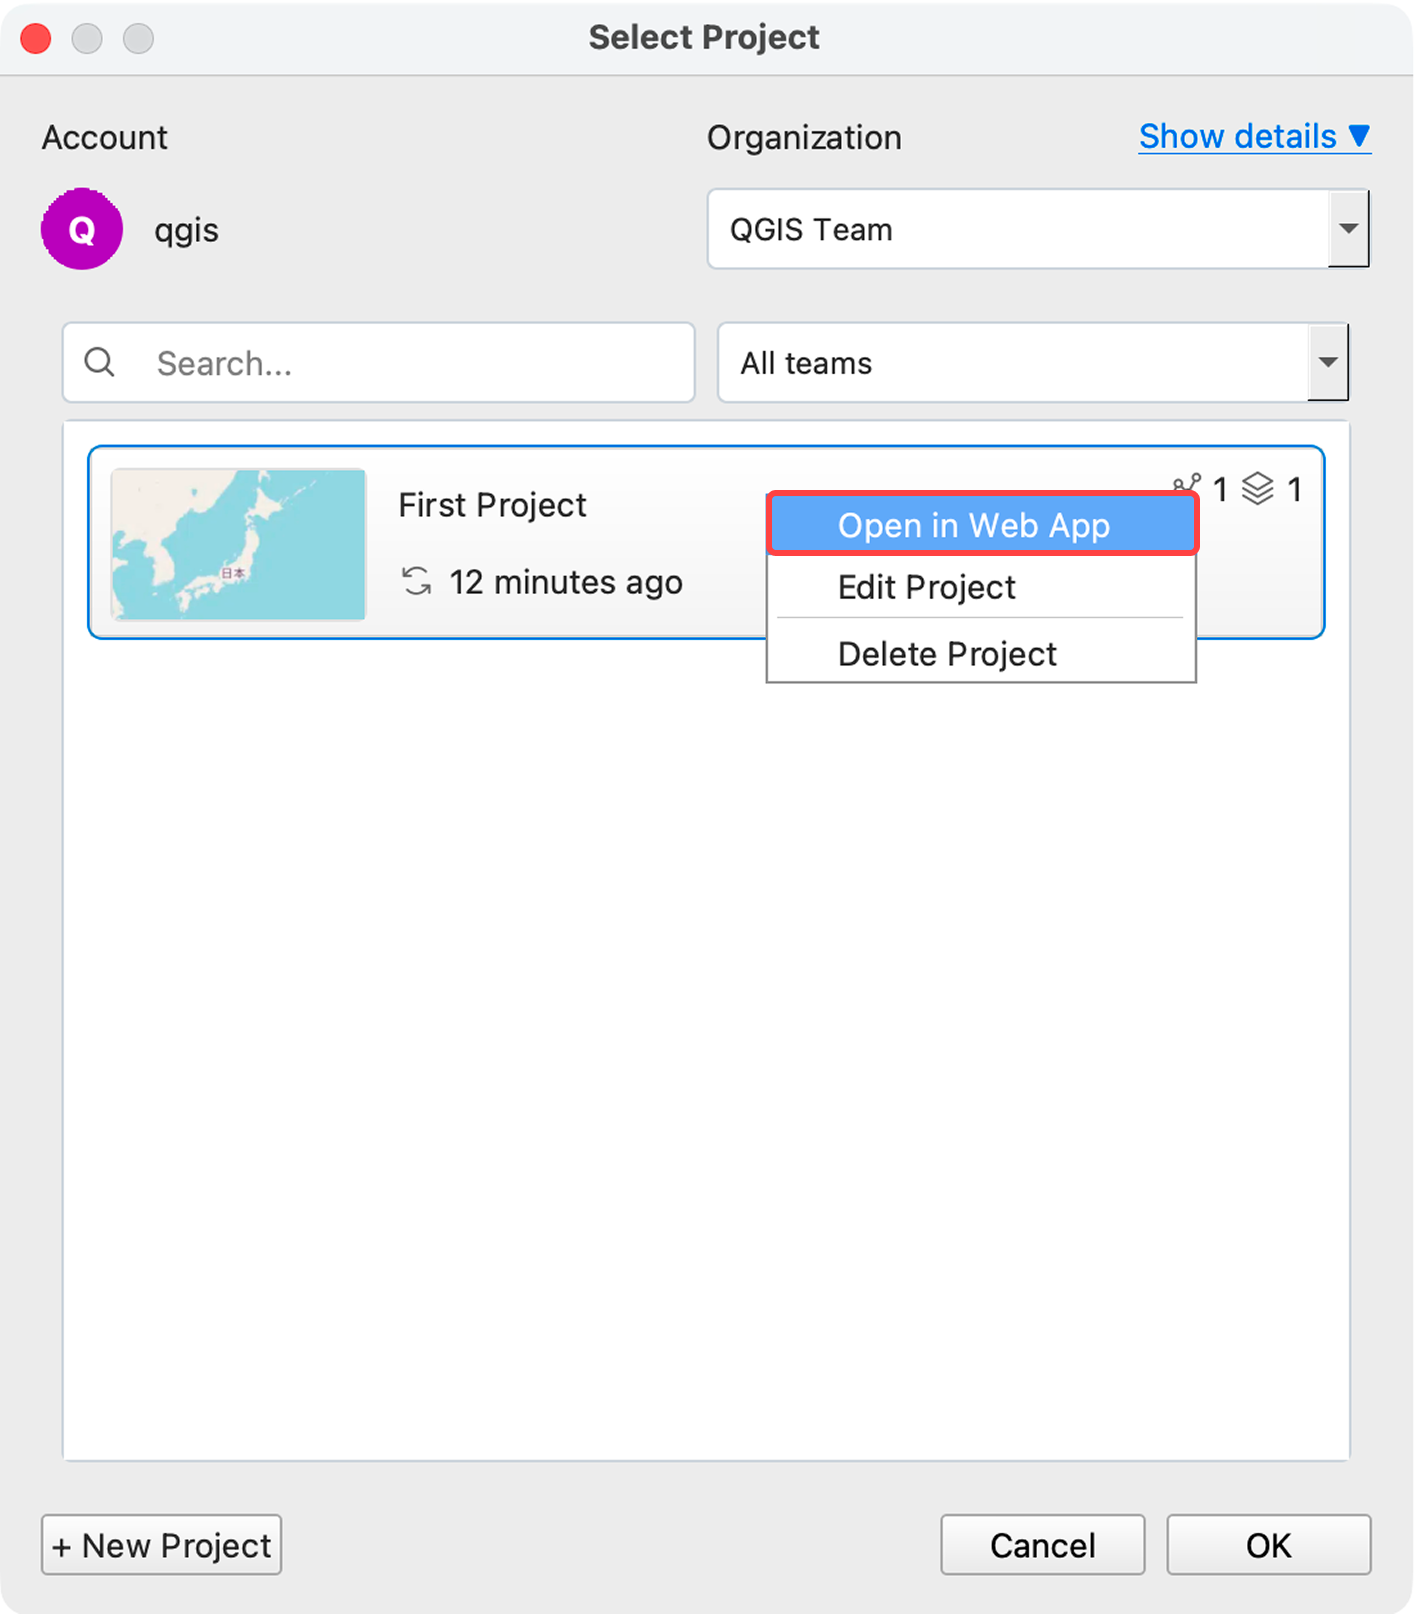
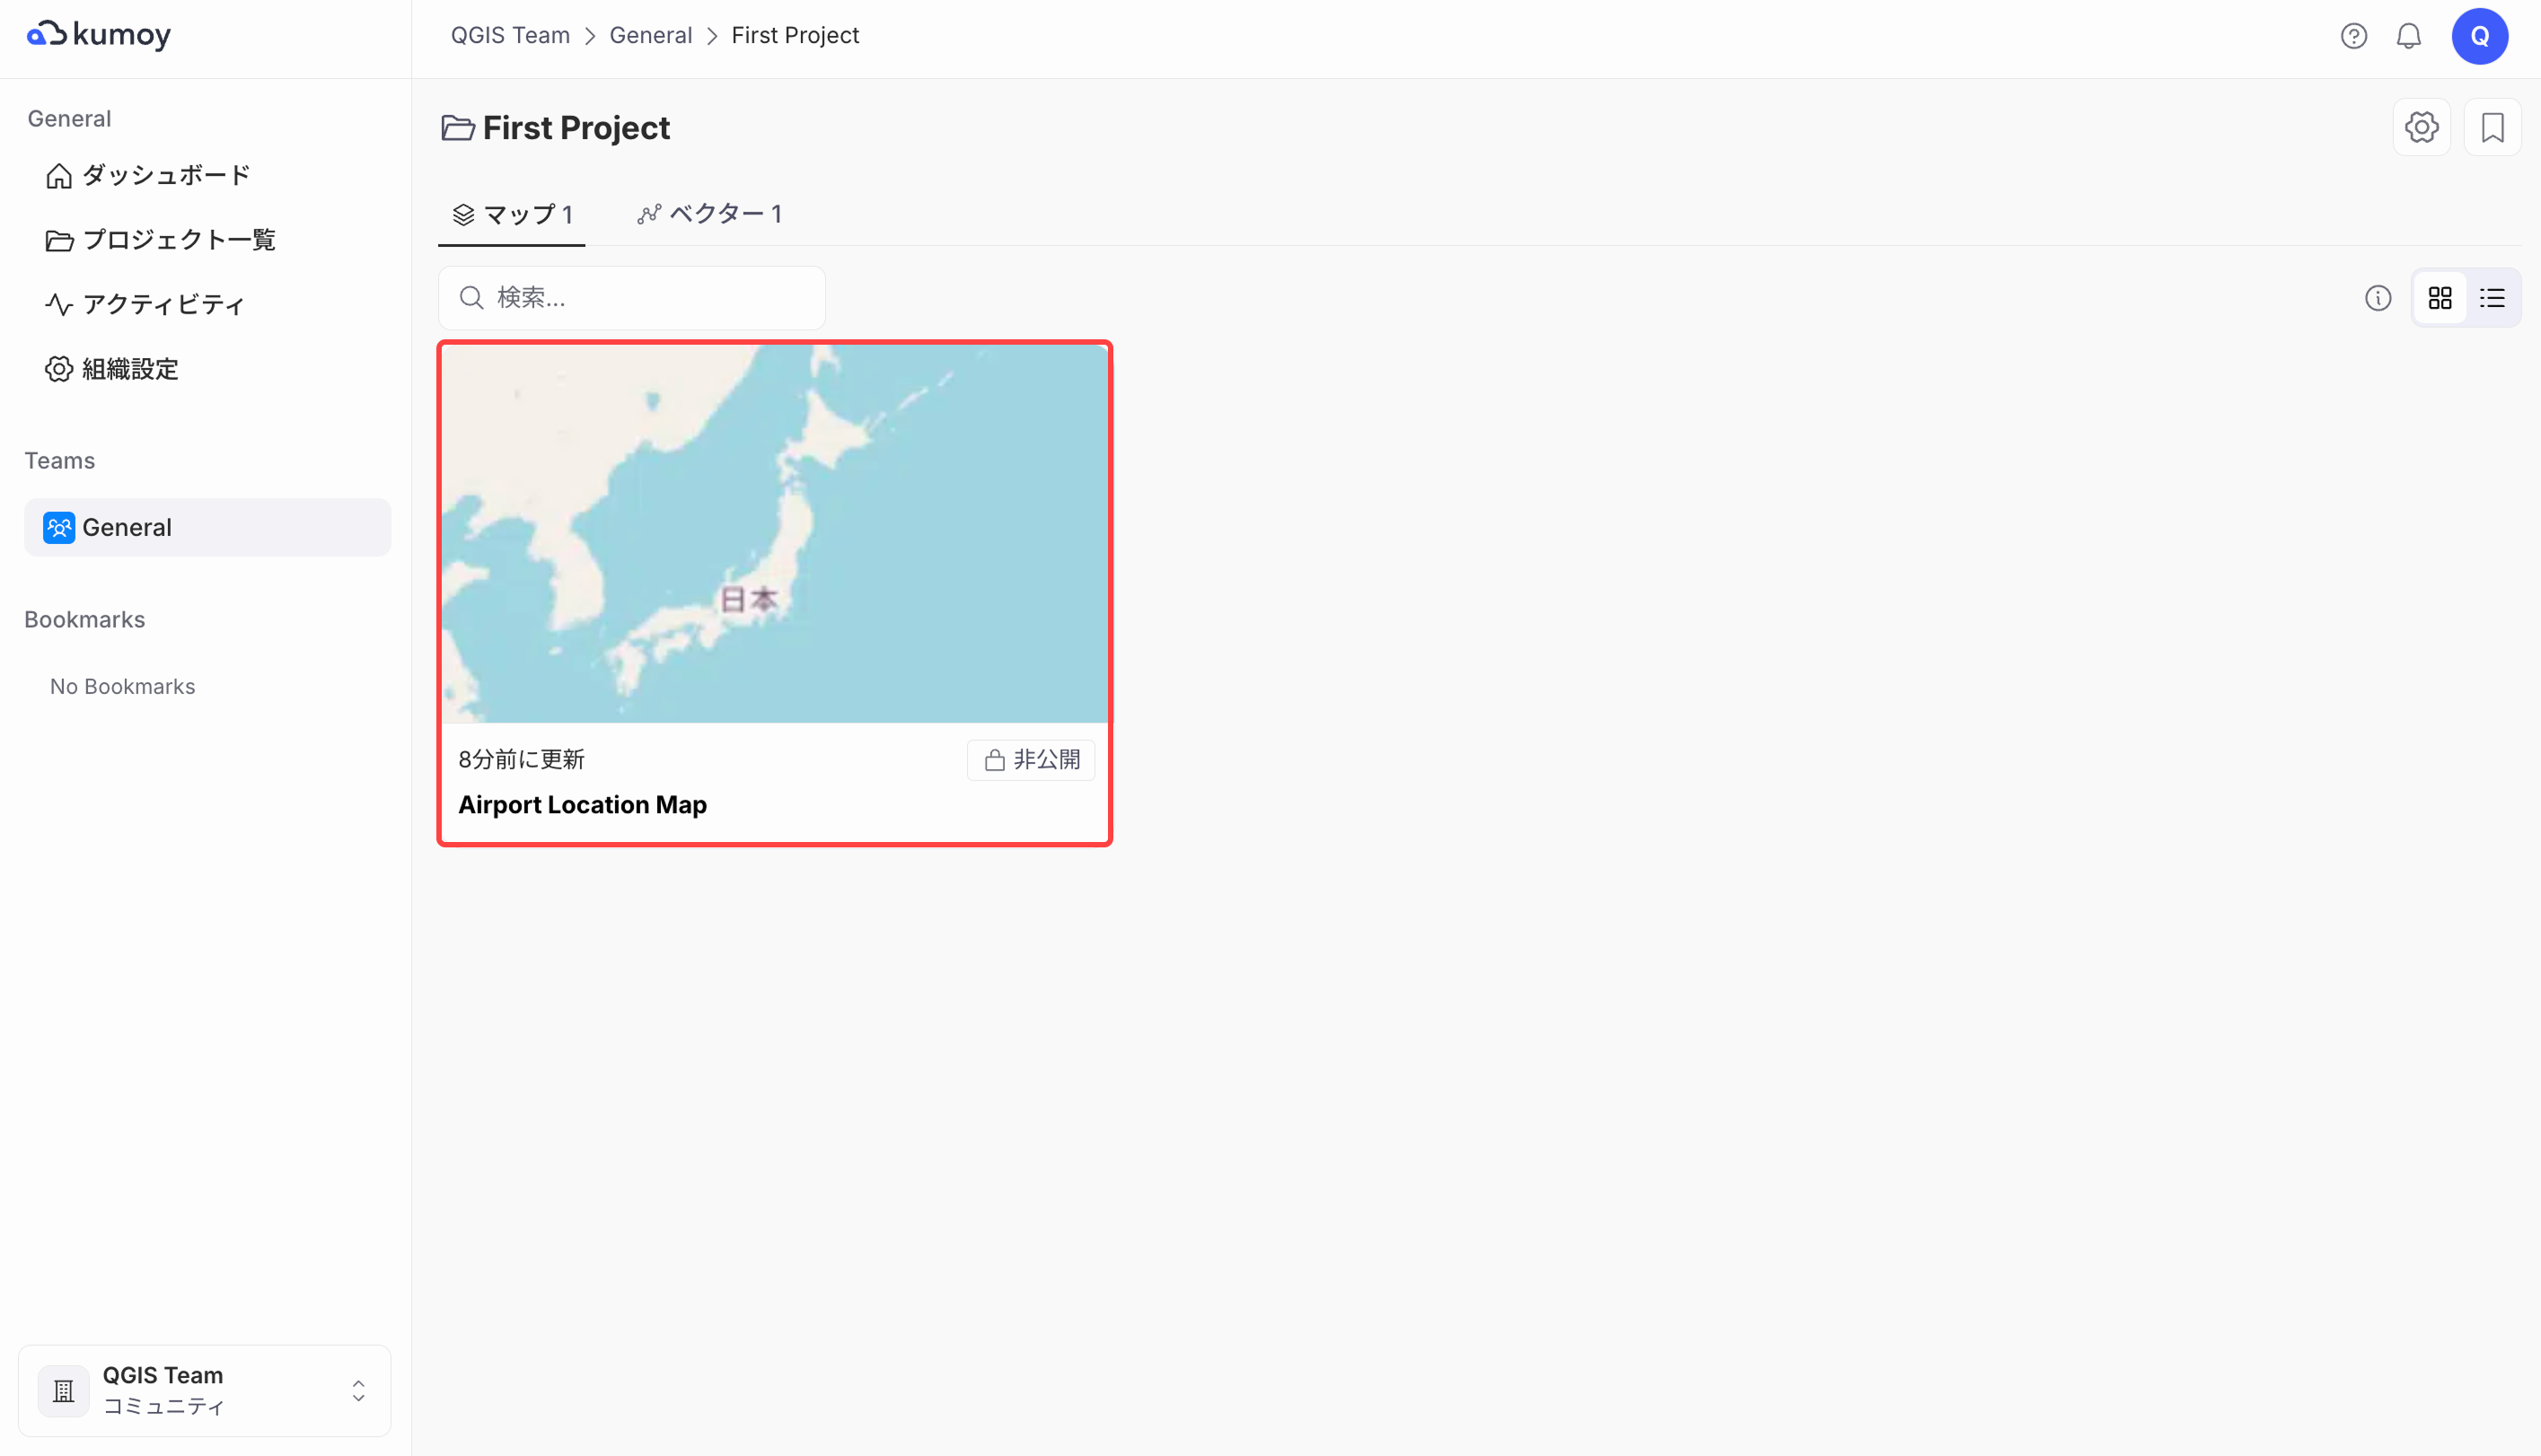
Right-click the target project in the project list and click Open in Web App.
-
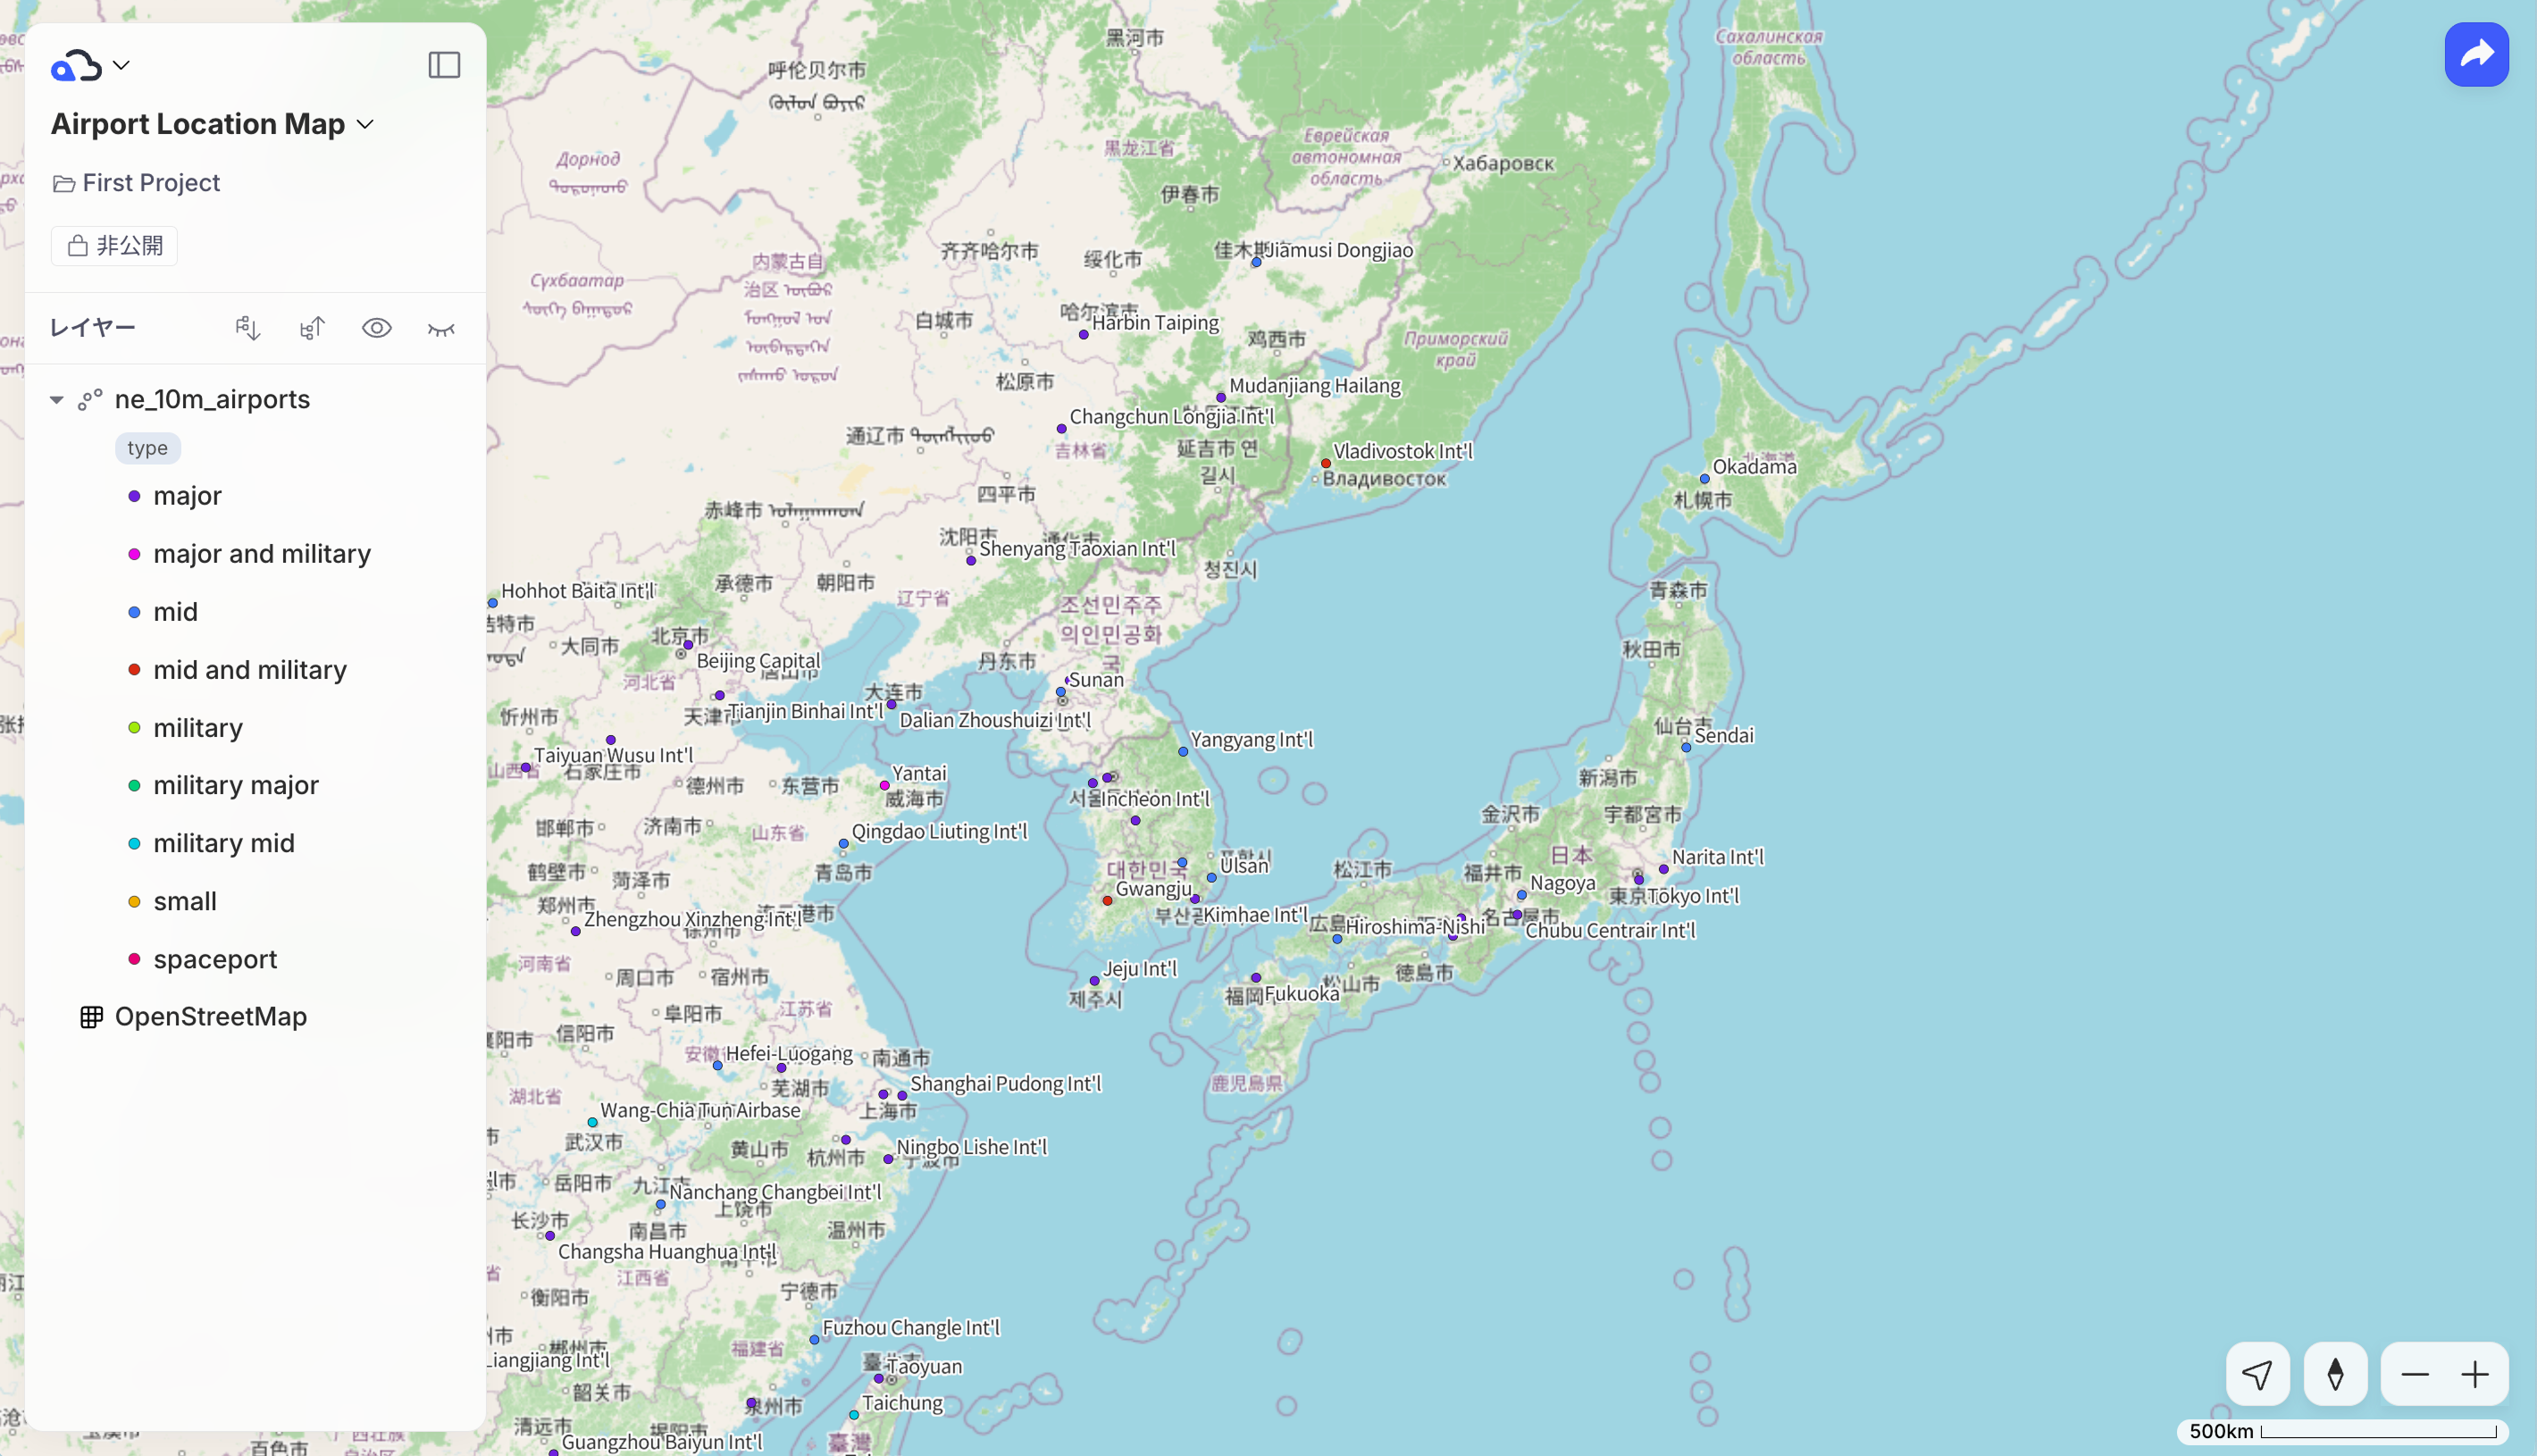
The project opens in your browser. Click on the target map.
-
The map is displayed on the web.
Learn More About Kumoy#
You have now completed the core getting-started flow: creating a map in QGIS, saving it to Kumoy, and viewing it on the web.
From here, explore the features that match your workflow:
- To understand how projects and data are structured, see Organization & Project.
- To learn how to create, upload, and edit vector data, see Vector.
- To learn more about viewing and publishing maps on the web, see Map.
- If you're working with a team, Team Use covers permissions and team management.
For a full overview, browse the documentation index to find the pages most relevant to you.
Last update: Jul 21, 2026 07:40:43